Table of Contents
Unix 101
In The Beginning...
“In the beginning there was the shell, and lo, it was good…”
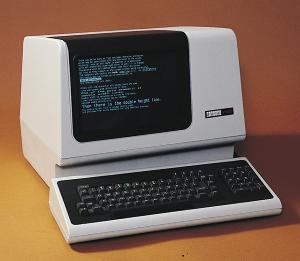
An 80×24 matrix of blurry green characters with a keyboard, it was pure 1970's sexy. No mouse, no graphics, just pure, unadulterated power. Microsoft and Apple would have you believe that a command line is something to be feared and avoided. Feared, yes, and rightly so, for there is great power in the command line; more than you will find in any GUI interface any day of the week. And with great power comes great responsibility… But for those knowledgeable in the ways of command-line-foo there is no going back.
Today, we have computers that are so powerful that we often run dozens of programs simultaneously, while the operating system runs a hundred or more in the background, and then we complain about how slow the machine is! In fact, in many ways, today's world has left the humble shell behind. Preferring instead to focus on giving us simultaneous access to our dozens of programs through a sleek, modern, graphical user interface (GUI).
Old And Busted:
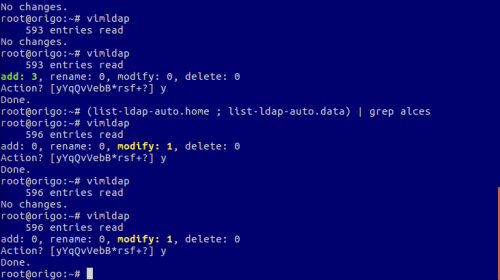
New Hotness:
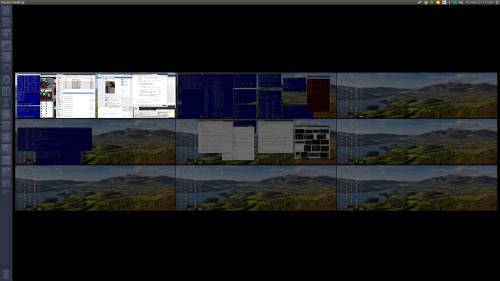
Q: How many windows do I actually have open on my desktop right now?
Why Should I Bother?
“But why,” I hear you say, “is any of this 1970's garbage relevant today, now that we have all of this flash-bang graphical GUI stuff?”
The answer is simple: Because…
- It's still the most powerful interface in the world
- When you log into a machine remotely from off-site, particularly a server of some kind, the shell is what you will interacting with
- All that flash-bang GUI stuff? Yeah, that stuff runs on top off the a stack of shells!
- A single shell can allow you to automate your workflow in ways that GUI interfaces cannot and never will – work smarter, not harder!
So this is something of which you should at least know the basics, and that's what this tutorial is all about.
- The shell is a special program that interacts with the user. It's job is to wait for the user to type in a command. When a command is received (the user pressed RETURN), the shell executes that command, updates it's internal state accordingly, and waits for the next command.
- Instead of entering commands manually, a user may decide to place commands into a file. The shell can execute the commands listed within the file just as though they were typed in by a user. This, and the modular nature of UNIX command line programs, is the key to the true power of UNIX: Enabling the user to automate their workflow in ways that simply can't be done with a GUI. Files that hold commands for a shell are called shell scripts, or just scripts for short.
- In today's highly-graphical user environment, the terminal is just another graphical program whose job it is to provide a window on the screen inside of which the shell can run and interact with the user.
Required Reading
The Shell
Accessing The Shell
If you are using a computer without a graphical user interface, then congratulations, you're looking at a shell environment – that, or a text-based login prompt that will take you to a shell environment.
If you're in a graphical desktop, then search for an application named “terminal”. There are many ways to do this depending on your operating system:
- If you're using the Ubuntu Unity desktop, which typically looks something like this:
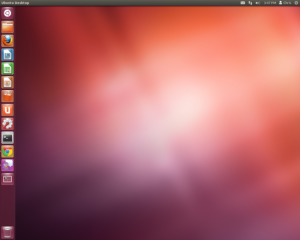
Then press the “Super” key (a.k.a. the “Windows” key on PC keyboards, or the “Command” key on Apple keyboards). Then type “terminal” into the dash search bar. The terminal should be the first application listed in the search results below the search bar.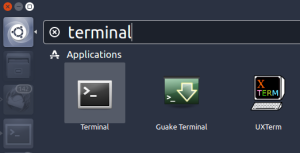
- If you're using the Gnome desktop, which typically looks something like this:
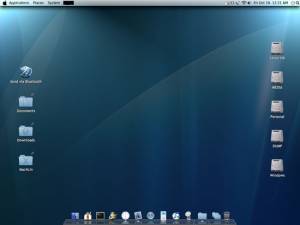
Then click on Applications > System Tools > Terminal
- If you're using KDE, which typically looks something like this:
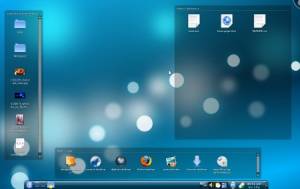
Then click on Programs > System > Konsole
When the terminal appears, you will be looking at a window running a shell inside of it.
NOTE: There are many different kinds of desktop environments available. Unity and Gnome
Shell Prompts
When the shell appears, it will print a prompt, letting you know some basic information and letting you know that it is ready for you to type in commands. Here's what a standard command line prompt looks like:
ecomiske@ilex:~$
What does that junk in the command line prompt mean?
| The Breakdown | |
|---|---|
ecomiske | Your user name (ecomiske is used here merely as an example) |
@ilex | The @ symbol followed by the hostname of the machine you are on: “ecommiske at ilex” |
:~ | The directory your command line shell is currently sitting in. In this case, ~ means your user home area |
$ | The typical last symbol at the end of a command line prompt. For all regular users this is $ |
Your command line prompt may look slightly different. The actual string of characters that makes up your command line is configurable via dot files in your home area, but that's beyond the scope of this tutorial.
Notation
Now is a good time to talk about the notation that will be used in the rest of this document. In many places, both here and elsewhere on the Internet:
- Whenever someone makes a reference to a command to be typed in on the command line, it will appear written thusly:
$ ls -al
The
$symbol here denotes that the text to follow is the command to be typed. So in accordance with the above example, you are instructed to type on your command line:ls -al. (NOTE: The character$or#itself is an indicator of the user privileges under which the command is to be used. A$symbol indicates that the command is to be typed as a regular user, where as a#indicates that the command should be typed by the administrator. Since this is not a systems administration tutorial you won't be asked to do anything as an administrator. But it's worth mentioning how the$and#characters are used so that you are aware of this when you read other documents online.)
- Whenever someone makes a reference to an unknown text that you the user are expected to fill in for yourself, that text is written thusly:
<something-only-you-could-know>
For example: For Jane Comiske,
<username>should be replaced withecomiske, while for Dr. Lou Gross,<username>should be replaced withgross. And<password>would be replaced with, you guessed it, your password.
- Whenever someone makes a reference to an optional text, that text is written as
[option]
A choice of options is written as
[option1|option2|option3...]
Home Areas
What is a home area? The terms “Home Area”, “Home Directory”, and “Home” are all terms used to refer to the same thing. A home area is where your files live. It's just a directory, but it's a special directory because it's your home directory. No matter what NIMBioS computer you log into, when you log on you will find yourself sitting in your home directory. You can go to any NIMBioS computer and be presented with your same home directory on each one. Create a file in your home directory on one machine, and that file will instantly appear in your home directory on any other machines that you happen to be logged into. It's almost like magic.
No really, where are my files? The physical location of your home directory need not be a concern to you (trust me, all you'll do is make your head hurt), all you need to know as a white belt user is that your home directory can always be found at ~. Alternatives for ~ include /home/<your-user-name> and ${HOME}, and each has an appropriate use, but let's not confuse the issue too much just yet. Just remember that ~ = Home.
| Name | Syntax | Example | Best Suited For Use In | ||
|---|---|---|---|---|---|
| Command Line | Shell Scripts | Applications | |||
| Tilda | ~ | $ cd ~ | Yes | Yes | Possibly |
| Absolute Path | /home/<your-user-name> | $ cd /home/ecomiske | Yes | Yes | Yes |
| Environment Shell Variable | ${HOME} | $ cd ${HOME}
| Yes | Yes | Probably Not |
Inside your home area is a set of standard files and subdirectories. Typically, the contents of a new user's home area are:
| What | Why |
|---|---|
~/usr/ | This directory is used to hold scripts, programs, and libraries that you install yourself. If you don't know what this means, don't worry about it. If you do know what this means, then under this directory you can create the following subdirectories: ~/usr/bin/, ~/usr/man/, and ~/usr/lib/. If you install your own programs here then the shell will automatically see them and use them when you type in your commands. |
~/Desktop/ | This directory contains the contents of your desktop. Any files you see on your desktop will appear within this directory, and any files you place in this directory will magically appear on your desktop. |
~/Documents/ | This directory is for you to use to put your created works in. |
~/Downloads/ | This directory is the default location where applications (such as web browsers) will place the files that they have downloaded from the Internet. |
~/Maildir/ | This directory holds all your email. |
~/Music/ | This directory is the default location for music and audio files. |
~/Pictures/ | This directory is the default location for image files. |
~/Public/ | This directory is the default location for files that you want to share with other users. |
~/public_html/ | This is the location of your personal web page. Create your own index.html file here, and it will show up in your browser when you go to http://www.nimbios.org/~<your-user-name>. |
~/Templates/ | This directory is a mystery. |
~/Videos/ | This is the default directory location for videos and movies. |
There may be other files and directories here as well, but in general you should not store your files or create your own directories here. Instead, it's encouraged that you place your files and directories under the appropriate directory from the table above, and keep the top level of your user home area clean and uncluttered.
The Current Working Directory
When you open a terminal window, or log in via SSH, the computer starts a shell program, which presents you with the shell prompt and awaits your commands. The shell program is always focused on a particular directory. When the shell program first starts, it is focused on your home directory, but as you have seen above, there are many other directories. Whatever directory your shell is currently focused on is called the “current working directory”.
The Root Directory
The root directory is the top-most level of the computer's filesystem. This directory is /. Every file or directory on the computer is located somewhere under this directory.
Directory Paths
Directory paths and their possible notations are often confusing to a lot of Unix newcomers, so this section is devoted to beating the concept to death…
A path is a way to specify the location of a directory. For example, for Jane, the ~/Desktop directory is the Desktop directory located at the top of her user home area: /home/ecomiske/Desktop. Since ~ is the same thing as /home/ecomiske, both notations refer to the same directory.
However, for Eric, whose home area is /home/carr, the notation ~ means /home/carr and not /home/ecomiske. The meaning of ~ differs for each user, but for each user, ~ always means the top of the user's home directory.
| What it means | |
|---|---|
| For Jane | ~ = /home/ecomise |
| For Eric | ~ = /home/carr |
| For Chris | ~ = /home/cwelsh |
| For any given user | ~ = /home/<username> (Where <userame> is replaced with the user's username.) |
The notation /home/ecomiske/Desktop is called an absolute path, because it specifies the exact location of the directory relative to the root directory. There is no way to confuse the Desktop directory in Jane's home are with the Desktop directory in Eric's home area, because the notation specifically says that this particular Desktop directory is to be found at /home/ecomiske/Desktop. That is to say, if Jane tells Eric that he can find one of Jane's document files in /home/ecomiske/Desktop then Eric will find the file right away.
The notation ~/Desktop, for Jane, is the same directory as /home/ecomiske/Desktop, but the location of the Desktop directory is specified relative to the location of Jane's user home area. This notation is called a relative path, because it's specification is dependent on some other reference point rather than the root directory. For Jane ~ is the same thing as /home/ecommiske, so she can find the directory using either notation. The difference here is that ~ is different for each user, and for Eric, ~ means /home/carr, not /home/ecomiske. So if Jane tells Eric that he can find a file at ~/Desktop, then Eric won't be able to find it, because he'll he looking in the wrong place.
To think of this another way, an absolute path is like a set of directions to a destination that begin with a globally known reference point. It's like saying, “To reach the grocery store, begin at the intersection of Cedar Bluff and Kingston Pike, drive west, at the next light turn right, then take the first left.” Anyone following these directions will find their way so long as they begin at the right starting point: the intersection of Cedar Bluff and Kingston Pike.
But a relative path is dependent on what might be a different reference point for me than it is for you. Let's say for instance that you call me up and ask me how I get to the grocery store from my home. I happily tell you that I get to the grocery store from my home by taking 3 left turns, a right, and then another left. If you then set out to get to the grocery store from your house following my directions you'll just wind up lost. This is because your starting point is different than mine, and so my directions wouldn't work for you.
| Notation | What it means |
|---|---|
| /dir1/dir2/…/dirN | Absolute paths are always specified relative to the top of the filesystem. |
| ~/dir1 | This relative path uses the user's home area (~) as the starting point of reference. |
| ./dir1/dir2/…/dirN | These relative paths both use the current working directory as the starting reference point. |
| dir1/dir2/…/dirN |
Exiting The Shell
You can exit your shell at any time by typing exit or holding down the control key and pressing the “D” key (control-d).
Command Line Help
Online Manual Pages
Most commands have an online manual page that can be accessed by typing:
man <command>
For instance:
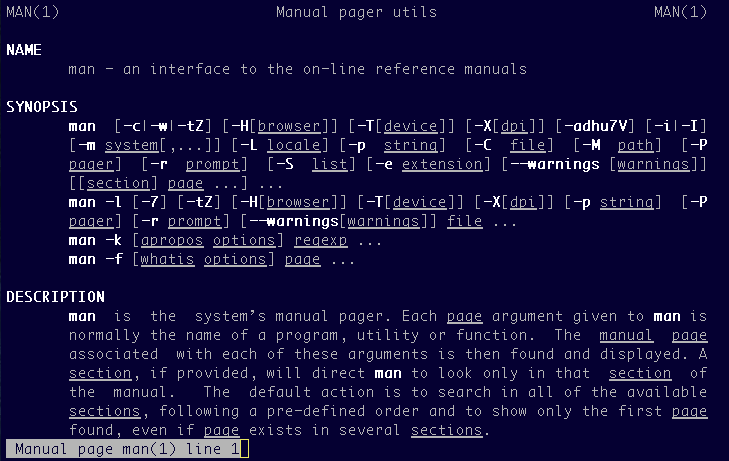
man man
This will give you the manual page for the man command itself.
Manual pages are typically broken up into a set of standard sections:
- NAME – A one-line or short paragraph description of the command
- SYNOPSIS – A compact (but often dense) description of the different ways the command can be used and all of it's options
- DESCRIPTION – A detailed description of the command, what it does, and detailed documentation on how to use it
- EXAMPLES (optional) – Typical uses of the command listed with commonly-used command line options, descriptions of the task performed with these options, and their expected output
- OPTIONS – A comprehensive and exhaustive, detailed list of each command line option that the command recognizes, what they do, and how to use them
- EXIT STATUS (optional) – For advanced usage, this section lists the possible error codes returned by the command
- ENVIRONMENT (optional) – For advanced usage, this section may list the environment settings that affect the way the command works
- FILES (optional) – A list of the files that the command uses (or can use) that affect the way the command works
- SEE ALSO (optional) – A list of other commands that are associated with this command
NOTE: There is a saying among unix system administrators, and that saying is “RTFM!” – which stands for “Read The Fine Manual!”. Other derivations of the letter “F” also have applications.
Program Help
Many commands will give you help if you specify the -h or –help command line option.
For instance:
man -h
This will give you a list of command line options that can be used on the man command. The help you get from the -h or –help (that's one dash before the letter “h”, and two dashes before the word “help”) options is usually just a quick summary of what you will find in the manual page from the man command.
Info Pages
Some commands do not have manual pages, but something called info pages instead. Your systems administrator personally is not a fan of the info command. It's a predecessor of the threaded navigation paradigm that you're used to seeing on web pages (where you can click a link to find more information about a particular subject), but it's text-based and difficult to use. Never the less, if you must use it, here is an example:
info man
This will show you the info pages about the man command.
Command Line Options
Command line options are merely that: options that tell the command details about what you want it to do. Command line options on Windows begin with a “/” character, like “/a”. But remember that on unix, the “/” character is part of a file or directory path, so on unix (including on Macs), command line options usually begin with “-” or “–” instead. For example:
-h, --help, -f, --file, -t
These are just a few examples.
There are two types of command line options: Simple command line options, and options that require an argument. Simple command line options are merely switches that tell the program to change it's behavior. Example:
-t -v -s
Commands that require an argument expect to find that argument immediately after the command line option. For example:
-f file.txt -t ascii
As you read about command usage here and elsewhere, simple options are often run together, like this:
-tvs
Command line options that require an argument, however, cannot usually be run together like this.
Some commands will perform a default task if given no options, other commands require command line options and will give you an error if you don't tell it what you want it to do. The easiest way to find out what a command expects from you is to try the -h or –help command line options.
Basic Commands
Listed below are some frequently-used, basic commands that every beginner Unix user should know.
cd
When you are in the shell environment and working with a command line, your shell is focused on a particular directory. The first time you open a terminal and are presented with a command line environment, your shell is focused on your home directory. As you have seen above, there are many subdirectories in your home directory. To navigate to another directory, you use the cd command. Whatever directory the shell is focused on is called the “current working directory”.
| Command | Effect |
|---|---|
cd | All of these commands have the same effect. They all change the current working directory of the shell to your home directory. |
cd ~ |
|
cd $HOME |
|
cd ${HOME} |
|
cd /home/<username> |
|
cd foo | Change the current working directory to the foo subdirectory. |
cd .. | Change the current working directory to the parent directory (i.e. move up one directory). |
cd ~/foo | Chang the current working directory to the foo directory, which is relative to the user's home directory. |
cp
The cp command copies files and directories.
| Command | Effect |
|---|---|
cp file1 file2 | Creates a copy of file1 called file2. |
cp file1 dir | Creates a copy of file1 and places it into dir. This creates a file named dir/file1 |
cp -R dir1 dir2 | Copies all files and directories within dir1 into dir2 (The -R stands for “recursive.) |
cp -i file1 file2 | Copies file1 to file2, but if a file2 already exists then cp will first ask for permission to overwrite the existing file2 with a new one. |
du
The du command displays the amount of disk usage occupied by a file or directory.
$ du -s -h ~
450M    .
In the above example, the files in your user home directory take up a total of 450 megabytes (M). The -s option stands for “sumarize”, and the -h option stands for “human-readable form” (i.e. used M for megabytes, G for gigabytes, K for kilobytes, etc).
The du command can be useful to compare the relative sizes of several directories. While -h will work here, it's more meaningful to use a standard reference for size. So instead of -h, the example below will use the -k option, which tells du to display all files and directory sizes in kilobytes. By default, the du command will act on the current working directory, and only return one number. To list the sizes of all files and subdirectories of the current working directory we use the * symbol.
$ du -sk *
116	bin
13122	Desktop
329051	Documents
.
.
.
From this we can see tht the bin directory only takes up 116K, while the Documents directory takes up 329,051K.
ls
The ls command displays a listing of a file or directory.
| Command | Effect |
|---|---|
ls | Lists the contents of the current working directory. |
ls <dir> | Lists the contents of the <dir> directory. |
ls -a | Lists the contents of the current working directory and also displaying “hidden” file (files that begin with a . in their filename). |
ls -1 | Lists the contents of the current working directory in “long” format, which displayes extra information about each entry. |
ls -F | Lists the contents of the current working directory, and appends an indicator to the end of file and directory names. |
ls -al <dir> | Lists the contents of the <dir> directory in long format, and includes hidden files. |
The following examples all list the contents of my current working directory, which happens to be the top of my home area (~peek/), but using different command line options to show you the different ways that the ls command can be used:
$ ls
Desktop  Documents  Downloads  Music  Pictures	Public	Templates  Videos

$ ls -F
Desktop/    Downloads/	Pictures/  Templates/
Documents/  Music/	Public/    Videos/

$ ls -a
.	       .fontconfig	.lesshst	      .ssh
..	       .gconf		.local		      Templates
.bash_history  .gconfd		.maple		      .update-notifier
.cache	       .gksu.lock	.Mathematica	      Videos
.camel_certs   .gnome2		.mozilla	      .viminfo
.config        .gnome2_private	.mozilla-thunderbird  .vimrc
.dbus	       .gnupg		Music		      .VirtualBox
Desktop        .gstreamer-0.10	.nautilus	      .wapi
.dmrc	       .gtk-bookmarks	Pictures	      .Xauthority
Documents      .gvfs		Public		      .xsession-errors
Downloads      .gvimrc		.pulse		      .xsession-errors.old
.esd_auth      .ICEauthority	.pulse-cookie
.evolution     .kde		.recently-used.xbel

$ ls -al
total 228
drwxr-xr-x 35 peek peek  4096 2010-02-08 11:59 .
drwxr-xr-x 13 root root  4096 2010-02-08 11:55 ..
-rw-------  1 peek peek  1207 2010-02-07 22:01 .bash_history
drwx------  2 peek peek  4096 2010-02-01 14:02 .cache
drwx------  2 peek peek  4096 2010-02-01 16:25 .camel_certs
drwxr-xr-x  6 peek peek  4096 2010-02-04 12:46 .config
drwx------  3 peek peek  4096 2010-02-01 14:02 .dbus
drwxr-xr-x  2 peek peek  4096 2010-02-01 14:19 Desktop
-rw-r--r--  1 peek peek    42 2010-02-08 11:58 .dmrc
drwxr-xr-x  2 peek peek  4096 2010-02-01 14:02 Documents
drwxr-xr-x  2 peek peek  4096 2010-02-01 14:02 Downloads
-rw-------  1 peek peek    16 2010-02-01 14:02 .esd_auth
drwxr-xr-x  7 peek peek  4096 2010-02-04 12:34 .evolution
drwxr-xr-x  2 peek peek  4096 2010-02-04 12:46 .fontconfig
drwx------  4 peek peek  4096 2010-02-08 11:59 .gconf
drwx------  2 peek peek  4096 2010-02-08 11:59 .gconfd
-rw-r-----  1 peek peek     0 2010-02-04 14:08 .gksu.lock
drwx------  6 peek peek  4096 2010-02-08 11:59 .gnome2
drwx------  2 peek peek  4096 2010-02-01 14:02 .gnome2_private
drwx------  2 peek peek  4096 2010-02-08 11:58 .gnupg
drwxr-xr-x  2 peek peek  4096 2010-02-04 12:45 .gstreamer-0.10
-rw-r--r--  1 peek peek   132 2010-02-08 11:59 .gtk-bookmarks
drwx------  2 peek peek  4096 2010-02-01 14:02 .gvfs
-rw-r-----  1 peek peek   394 2009-04-22 14:57 .gvimrc
-rw-------  1 peek peek  1248 2010-02-08 11:58 .ICEauthority
drwxr-xr-x  3 peek peek  4096 2010-02-04 12:46 .kde
-rw-------  1 peek peek    43 2010-02-07 17:19 .lesshst
drwxr-xr-x  3 peek peek  4096 2010-02-01 14:02 .local
drwxr-xr-x  3 peek peek  4096 2010-02-04 12:46 .maple
drwxr-xr-t  8 peek peek  4096 2010-02-04 12:46 .Mathematica
drwx------  4 peek peek  4096 2010-02-01 14:19 .mozilla
drwx------  3 peek peek  4096 2010-02-01 14:19 .mozilla-thunderbird
drwxr-xr-x  2 peek peek  4096 2010-02-01 14:02 Music
drwxr-xr-x  2 peek peek  4096 2010-02-01 14:02 .nautilus
drwxr-xr-x  2 peek peek  4096 2010-02-01 14:02 Pictures
drwxr-xr-x  2 peek peek  4096 2010-02-01 14:02 Public
drwx------  2 peek peek  4096 2010-02-08 11:58 .pulse
-rw-------  1 peek peek   256 2010-02-01 14:02 .pulse-cookie
-rw-------  1 peek peek   218 2010-02-08 11:59 .recently-used.xbel
drwx------  2 peek peek  4096 2010-01-19 09:22 .ssh
drwxr-xr-x  2 peek peek  4096 2010-02-01 14:02 Templates
drwx------  2 peek peek  4096 2010-02-01 14:02 .update-notifier
drwxr-xr-x  2 peek peek  4096 2010-02-01 14:02 Videos
-rw-------  1 peek peek  4299 2010-02-07 22:01 .viminfo
-rw-r-----  1 peek peek  1098 2009-04-22 14:58 .vimrc
drwxr-xr-x  4 peek peek  4096 2010-02-07 16:46 .VirtualBox
drwxr-xr-x  2 peek peek  4096 2010-02-08 12:00 .wapi
-rw-------  1 peek peek   250 2010-02-07 17:31 .Xauthority
-rw-------  1 peek peek  8715 2010-02-08 11:59 .xsession-errors
-rw-------  1 peek peek 21473 2010-02-04 14:08 .xsession-errors.old
mkdir
The mkdir command creates a new directory.
| Command | Effect |
|---|---|
mkdir foo | Creates a new directory named foo. |
mkdir foo/bar | Creates a new directory named bar inside the directory named foo. |
mkdir -p foo/bar | Creates a new directory named bar inside a directory named foo, and automatically creates foo if it does not already exist. |
rmdir
The rmdir command removes a directory, but only if the directory is empty.
| Command | Effect |
|---|---|
rmdir foo | Removes the directory named foo. |
rmdir foo/bar | Removed the directory named bar inside the directory named foo, but does not remove foo. |
mv
The mv command moves and renames files and directories.
| Command | Effect |
|---|---|
mv oldfile newfile | Renames the file oldfile to newfile. |
mv olddir newdir | Renames the directory olddir to newdir. |
mv file dir | Moves the file file to the directory dir. |
mv srcfile dstdir | Moves the file srcfile to the directory destdir. |
mv srcfile1 srcdir1 srcfile2 srcdir2 destdir | Moves all of the source files and directories into the destination directory. |
rm
The rm command removes (deletes) files (and directories, if used with the -r option). To remove directories, also see the rmdir command.
| Command | Effect |
|---|---|
rm file | Deletes the file file. |
rm -i file | Deletes the file file, but first asks for confirmation. |
rm -r dir | Deletes everything in the directory dir, and then deletes the directory dir. |
CAUTION: There is NO undelete command for unix. Once a file or directory has been deleted THERE IS NO WAY to bring that file or directory back. The only way to recover a lost file or directory is to restore it from backup.
File Names, Directory Names, and Wildcards
Most of the file you will provide a list of files and/or directories for a command on the command line, one at a time and separated by a space. But what if there are too many pathnames to list one at a time? Or, conversely, what if you're just too lazy to list them? Computers were invented to be labor-saving devices, so of course there's a way to make the machine do your work for you. That's where wildcards come in. A wildcard is a special character or tag that the shell recognizes as a filter for selection criteria from a directory listing.
| Pattern | Matches |
|---|---|
* | Used by itself, this will match any file or directory name. $ ls -1 * Aware_-_Kontinuum.flac Glaciers-SD.mp4 log-messages.txt MendelMax_3_Full_Kit_Packing_Slip_-_Sheet1.csv README |
G* | Matches any file or directory name that starts with a G. $ ls -1 G* Glaciers-SD.mp4 |
*.txt | Matches any file or directory name that ends with .txt. $ ls -1 *.txt log-messages.txt |
file*.txt | Matches any file or directory name that begins with file and ends with .txt |
READ??? | Matches any file or directory name that starts with READ, followed by exactly three more characters. |
[abc]* | Matches any name beginning with either an a, a b, or a c, followed by any number of characters. |
file-[0-9][0-9] | Matches any name beginning with file- and followed by exactly two characters. |
[[:upper:]]* | Matches any name beginning with an upper case character, and followed by any number of characters. $ ls -1 [[:upper:]]* Aware_-_Kontinuum.flac Glaciers-SD.mp4 MendelMax_3_Full_Kit_Packing_Slip_-_Sheet1.csv README |
[![:digit:]]* | Matches any name not beginning with a number. |
*[[:lower:]123] | Matches any name ending with a-z, or the numbers 1, 2, or 3. |
Leaving Things Running In The Background
Normally you can run a program in the background by append the & symbol to the end of the command line. This is nice, but you'll quickly notice that whenever a shell process exits it sends a signal (called the “hang-up” signal, or HUP) to all of it's children telling them to exit as well. This means that when you exit your shell, anything you had running at the time will die – even if you ran it in the background with &. For processes that you expect to take hours or even days (simulations for instance), this may not be desirable. You may want to be able to exit your shell and log out without worrying about your programs dying.
There are two ways around this conundrum:
- There is a special command called
nohupthat will intercede on your program's behalf and stop the HUP signal from reaching the child process. If your command would be<command> <options>…, then you would use nohup by putting it at the beginning of your command line:nohup <command> <options>…. The child program should not expect any keyboard input from the user. If it does, then your program won't get any input once you log out. The nohup program will create a file in the current directory callednohup.outthat contains the output from your program. You can look at this file later to see if your program looks like it's working correctly or not. - There is another, more complex program called
screenthat creates a fake terminal in which your program runs. The nice thing about screen is that (a) your program can be interactive and expect input from the user, and (b) you can disconnect and reconnect to screen as many times as you want. The ability to reconnect to screen makes it a favorite of mine, as it allows me to start a command, leave for the day, and then later log in remotely from home to check on how things are going. Screen can also be used to create more fake terminals on the fly, and allow the user to switch between them at will.
Playing Around
Now that you have a few commands to play with, let's play with them:
| Type: | $ mkdir /tmp/playground |
|---|---|
| Type: | $ find /tmp/playground /tmp/playground |
| Type: | $ cd /tmp/playground |
| Type: | pwd /tmp/playground |
| Type: | $ mkdir dir1 dir2 |
| Type: | $ cp /etc/passwd . |
| Type: | $ find . ./passwd ./dir1 ./dir2 |
| Type: | $ mv passwd fun |
| Type: | $ find . ./dir1 ./dir2 ./fun |
| Type: | $ mv fun dir1 |
| Type: | $ find . ./dir1 ./dir1/fun ./dir2 |
| Type: | $ mv dir1 dir2 |
| Type: | $ find . ./dir2 ./dir2/dir1 ./dir2/dir1/fun |
| Type: | $ cd |
| Type: | $ rmdir /tmp/playground rmdir: failed to remove '/tmp/playground': Directory not empty |
| Type: | $ rm /tmp/playground/dir2/dir1/fun |
| Type: | $ find /tmp/playground /tmp/playground /tmp/playground/dir2 /tmp/playground/dir2/dir1 |
| Type: | $ rmdir /tmp/playground/dir2/dir1 |
| Type: | $ rmdir /tmp/playground/dir2 |
| Type: | $ rmdir /tmp/playground |

