Table of Contents
Virtual Machines
A virtual machine is a fake machine that runs inside of a real machine. The physical machine, and the operating system it runs, is referred to as the “Host”, while the virtual machine is referred to as the “Guest”, “Virtual Machine” or “VM”. A virtual machine uses the same keyboard, mouse, and monitor, and shares them with the operating system running on the physical machine. Virtual machines are very useful for people needing to use multiple operating systems, or different configurations of the same operating system. Generally speaking it's possible to run any operating system that you can install on a regular PC into a virtual machine, so long as the required resources are available. For instance, you can run multiple Windows and Linux operating systems in a virtual machine. But you can't run OSX, because Apple's OSX will check to see that you have Apple hardware before allowing the installation.
Windows VirtualBox
Because even here at NIMBioS – in Linux haven – you are not safe from the clutches of the Microsoft Empire…
Installing A Pre-Built Windows VirtualBox
Usually this is done for you by the IT staff, but it is possible to install as many virtual machines as you want, so long as you have storage space and resources to run it.
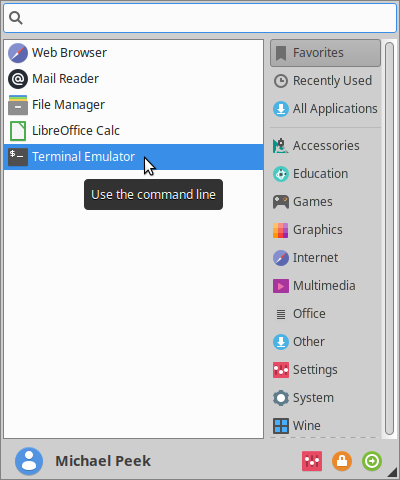
- Open a terminal
- In the upper-left corner of your screen, click on the Whisker Menu icon (the blue circle with a tiny white mouse head in the center)

- In the menu that appears, click on “Terminal Emulator”.
- Type:
cd /home/groups/everybody/IT/VBoxes/Windows-10
- Type:
./install
The install script will plop down a fresh Windows-10 virtual machine for you. If you already have a Windows virtual machine then don't worry, this won't overwrite your existing virtual machine. Instead it will give the new one a different name.
Opening the VirtualBox Application
- Open the VirtualBox application
- If the IT staff set up your Windows virtual machine for you then you may already have the VirtualBox icon on your top control panel. If so, look for this icon:

- Otherwise:
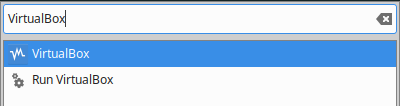
- Click on the Whisker Menu
- In the menu that appears, type: “VirtualBox”, and click on the application in the search results.
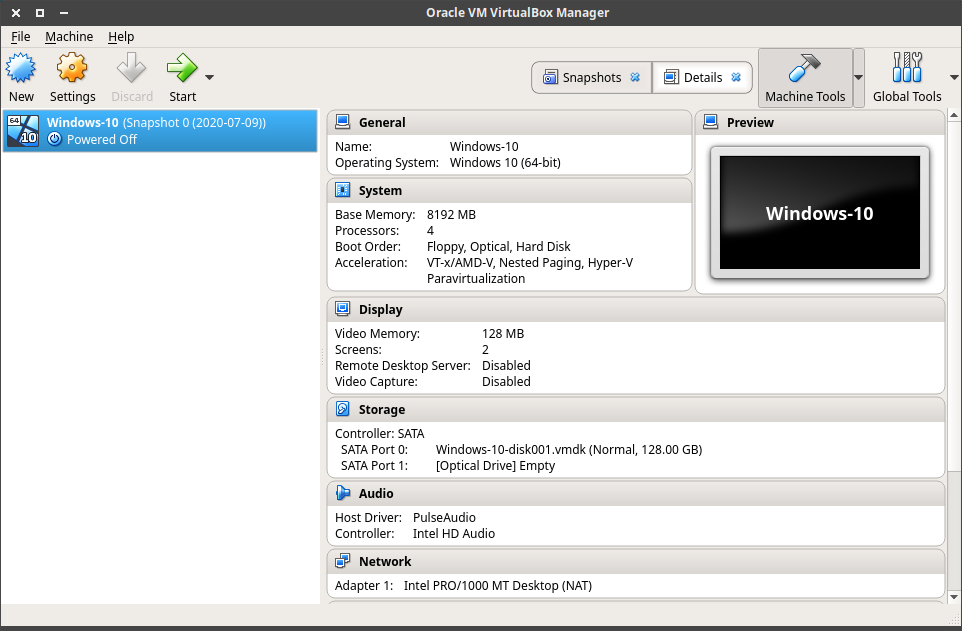
- You will see the VirtualBox application window appear:
Starting Your Windows Virtual Machine
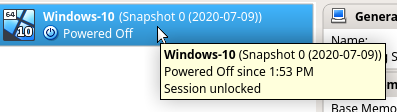
- On the left side of the VirtualBox window there is a list that contains all of the virtual machines currently installed in your account. If you just have the one Windows-10 virtual machine then that will be the only one listed:

However, you might have multiple virtual machines (like I do):
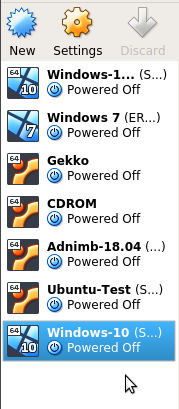
- If you have multiple virtual machines listed, be sure that the one you want to start is highlighted. If not, click on the one you want.
- Click on the
Startbutton.

- You will see a new window (or possibly multiple windows) appear. Each window is a virtual monitor for the virtual machine. Inside the window you will see the virtual machine booting up. Eventually it'll be up, running, and ready to use.
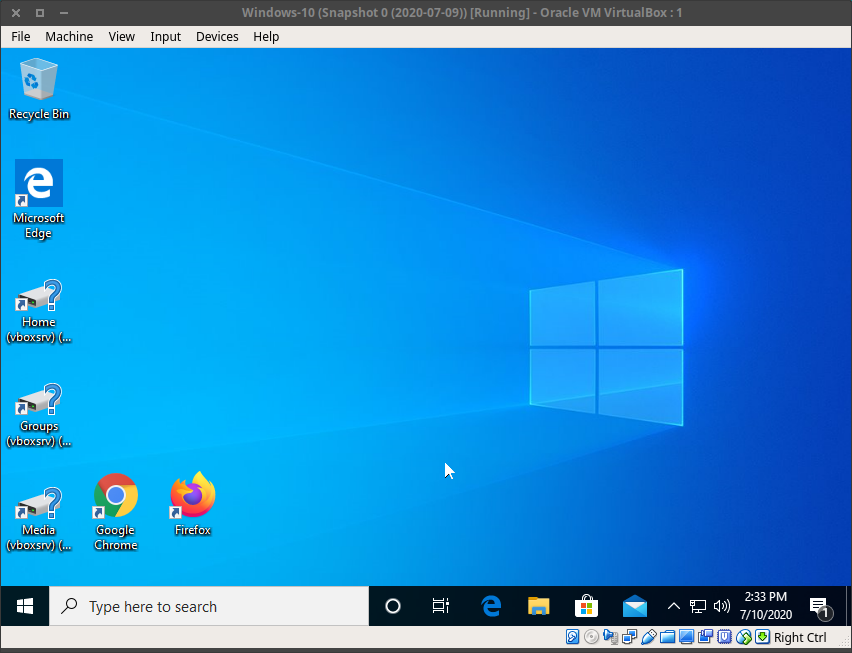
- If your virtual machine window is too small, click on the maximize button at the top left of the window to make it take up the entire screen.

Using Your Windows Virtual Machine
For the most part you will use Windows just as you would normally. You open applications, click on stuff and type the things. The real discrepancies between your Windows virtual machine and Windows running on a physical machine come into play when you choose where to store files, and when you need to use the virtual machine to access physical devices.
Shared Folders
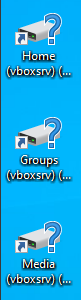
- On the desktop you will notice what appears to be network drives, one labeled
Home, oneGroups, and oneMedia:
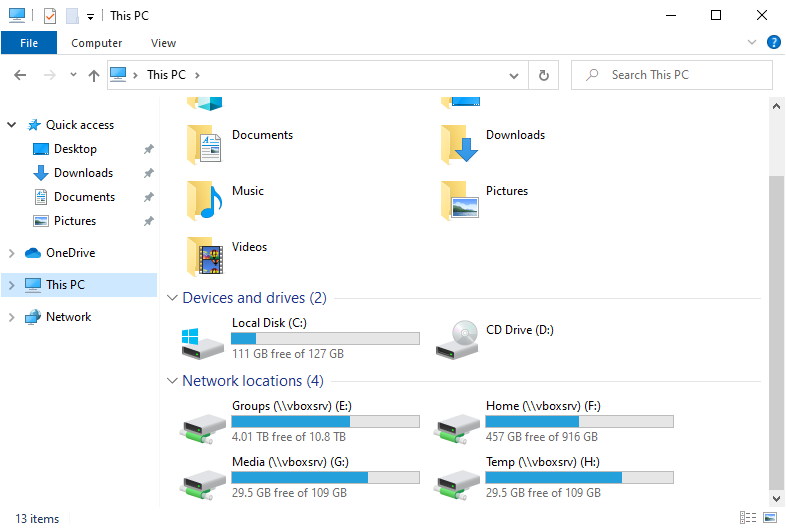
If these icons are not on your desktop then you can find them underThis PCin the Windows File Explorer:
- Under
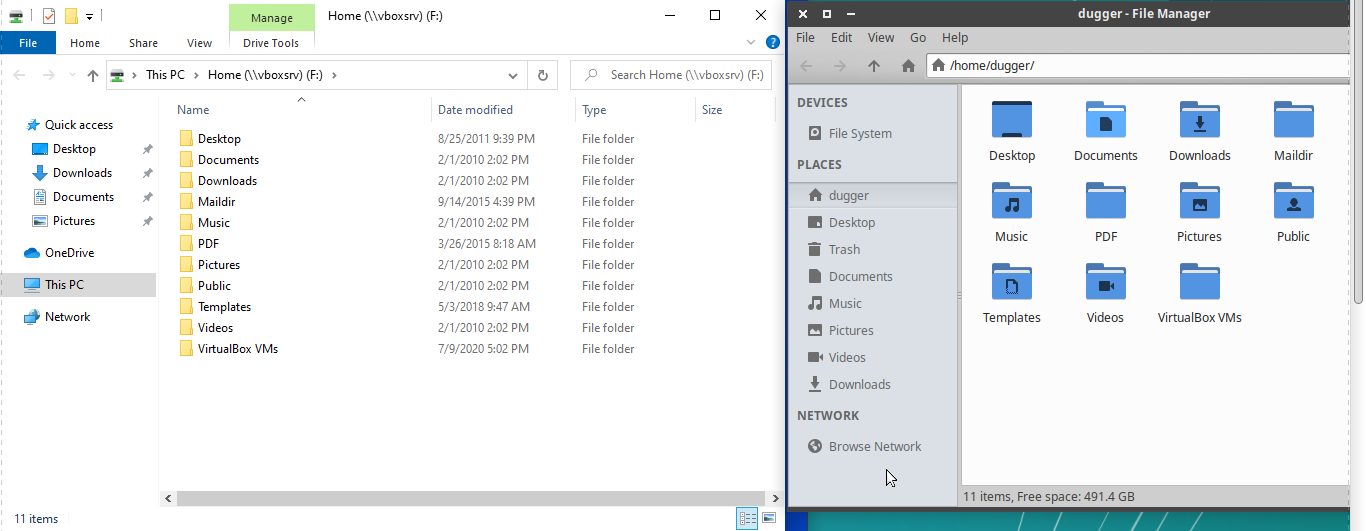
Homeyou will find all of the same files that you find with the Linux file manager. Here are the two file explorers pictured side-by-side for comparison, the left one Windows and the right one Linux:

- Under
Groupsyou will find all the same files that you find with the Linux file manager if you were to go the/home/groups/directory:
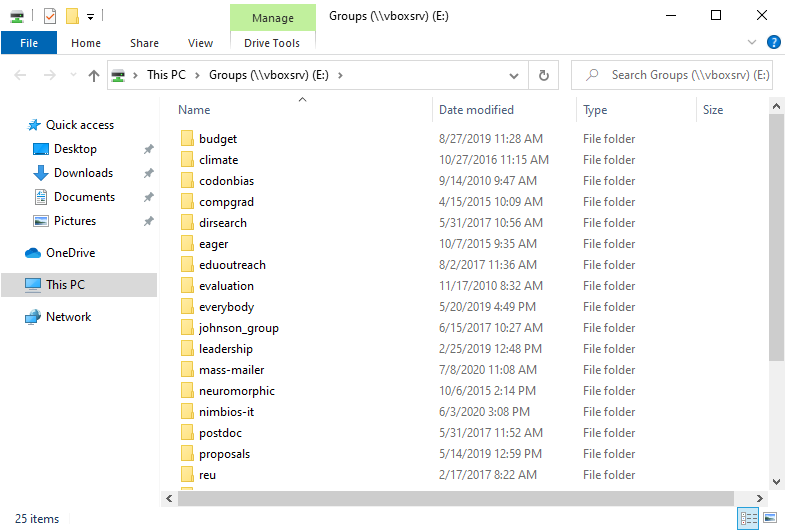
The groups folder is a shared space available to everyone who has an account on the NIMBioS system. Each user is assigned access to one or more groups depending on the nature of their work.
- Under
Mediayou will find the mount point for any removable media currently mounted by the Linux operating system.
Q: What happens when you insert a CD, DVD, or USB drive into your workstation?
A: Linux mounts the device, and virtual machines never see it – unless you tell the virtual machine to mount it explicitly.
TheMediashared folder is one method for giving the virtual machine access to removable media mounted on Linux without the need for going through any extra steps. However, this does mean that for writable media, like USB drives, you will need to use Linux to eject the device before you can safely remove it.
To attach devices directly to the virtual machine see the instructions below.
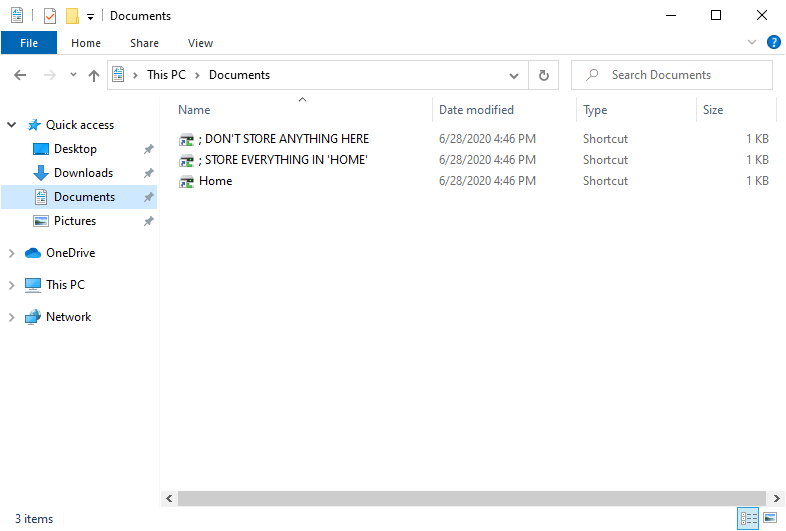
** NOTE: Store Everything In The Shared Folders!**
Don't store anything on the Windows virtual machine itself except applications. There are two reasons for this:
- Virtual machines are meant to be as disposable as possible. If Windows breaks (which it can and does), or if Windows is compromised by a hacker, then the IT staff can quickly and easily replace the virtual machine and get you back up and running as quickly as possible.
- The backup server runs Linux, and it only backs up Linux files. And to the backup server, your virtual machine's virtual hard drive looks like just one gigantic file:

(A file you save inside Windows is somewhere inside that giant multi-gigabyte file!)
If you need a file restored from backup and it's stored in the shared folders then it's stored on the Linux filesystem – and that means it takes mere minutes to locate and restore your file. But if your file is stored inside the Windows virtual hard drive then it could take a day or more just to find it.
As a reminder, the most commonly-used locations in your Windows virtual machine will contain shortcuts to the Home shared folder. For example, this is what the Documents folder looks like in the file explorer:
Q: But applications often assume that they should save to places like Downloads, or Documents, or something similar.
A: I know. Which is why it's still allowed. Some programs will balk and refuse to work if I try to replace them with shortcuts directly to the appropriate location under the Home folder. But if the file is important to you and you want it backed up properly, then move it to the Home folder when you get a chance.
Q: But that's an extra step for each file!
A: I know. But most applications allow you to tell it where to store files, and will remember that location in the future. Do that for every application that you can and then you're good to go.
Attaching CD's, DVD's, and ''*.iso'' Files Directly To Your Virtual Machine
- At the top of the VirtualBox window, click
Devices>Optical Drives.
- You will see a pop-up menu like this:
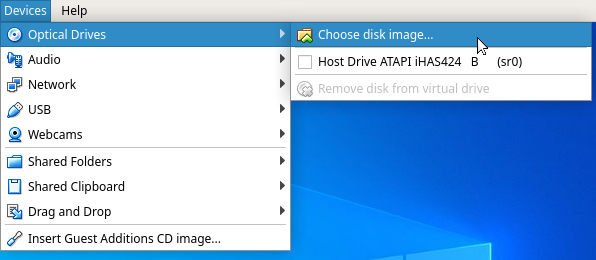
- Select your device.
- Selecting
Host Drivewill attach the physical CD/DVD drive of your workstation to the virtual machine, and any disk in there will be visible to Windows. - If you want to attach a
*.isoimage file then selectChoose Disk Imageand navigate to the location of your ISO file and select it. - Selecting
Remove disk from virtual drivewill eject it.
Attaching USB Devices Directly To Your Virtual Machine
If you don't like the idea of going through Linux to access removable media then you can mount it directly to your virtual machine.
- Sometimes devices are listed as something useful, like
Camera. But if you have multiple USB drives plugged in then they may simply be listed asGeneric Mass Storage Device. If you have multiple devices like this plugged in, then first take note of what's already attached before you plug in anything new.- At the top of your VirtualBox window, click
Devices>USB. - Pay attention to the devices listed. Each device has a number listed between square brackets.
- At the top of your VirtualBox window, click
Devices>USB.
- In the list of devices, select the device you want.
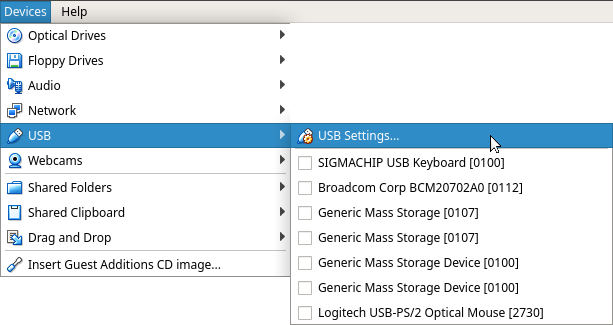
If you have multiple devices by the same name, look for the new one by comparing the numbers between the square brackets.
Q: But wouldn't it be far more useful if storage devices were listed by their drive labels? For instance, if I labeled one USB drive “MyPetPictures” and another one “ImportantDocuments”, then I'd know which one to attach!
A: Yes. Yes it would. It would be far more useful, in fact. And I have longed for the day that Virtualbox is smart enough to do just that.
IMPORTANT: Always Eject Your USB Drives!
Windows and Linux both use what's called “caching” filesystems. This means that when you save a file not all of it is written out immediately to the device. Some data may be left in memory for a while as the operating system waits for more data before writing it all out. This is a speed optimization feature that makes the user experience smoother and more pleasant. But the downside is that if you don't eject your media before you remove the device you risk data loss and file corruption. Consider yourself warned.
IMPORTANT: Never attach your keyboard or mouse!
VirtualBox already knows how to share the mouse and keyboard with the Linux workstation. If you attach them directly to the virtual machine then those devices will no longer be accessible to Linux. You won't be able to click on anything outside the VirtualBox windows, nor will you be able to detach them from your virtual machine, until you shut your virtual machine down. If you accidentally attach your mouse or keyboard, first shut down and restart your virtual machine. (NOTE: Actually choose Shutdown, not Reboot. You want the virtual machine to exit and the windows to disappear, then you want to click the Start button in the VirtualBox application to bring everything back. Simply clicking Reboot won't do the trick.) If that doesn't work, ask an IT staff member for help.
Shutting Down Your Windows Virtual Machine
Just like a real machine, it is always recommended that you go through the proper shutdown procedure to exit your virtual machine. Modern operating systems use what's called “caching” filesystems that may still have data sitting in memory, waiting to be written out, even after you have clicked Save and exited the program. Without a proper shutdown you risk data loss and file corruption. Consider yourself warned.
Snapshots
TODO
Troubleshooting
TODO
Disclaimer
- NIMBioS IT staff will not take responsibility for your personal machine. The reader is expected to know how to administrate his or her own machine.
- The documentation above is merely for guidance. Menus, options, and commands presented may not match the reader's particular operating system, software, or versions.
- None of these documents have a brain. Readers are expected to provide their own.
