Table of Contents
Where To Get Models
There are a plethora of available models online. One place to go to find them is to use the 3D model search engine known as Yeggi:
By entering a few search terms, Yeggi will display all of the models that it knows about, and link you to where they can be found.
- Pro: You don't have to know anything about modeling. You just download and print.
- Con: Not all models work. Not all models were designed for FDM materials. And not all models were designed to work on our printers. Modelers tend to design for themselves and then share the model as-is. Good (or really nice) modelers take into account the types of printers and materials on the market that users will likely have access to and tailor their models accordingly. But this is not always the case, so caveat emptor.
Software To Design Your Own Models
There are multiple software options available. I tend to stick with free and/or open-source, and that's whats listed here.
- https://www.tinkercad.com/ – This is the quickest and easiest way to get started. It runs completely within your browser, which means that there is no need to download or install any software. After creating an account you are presented with about 30 minutes of tutorials, and then you're ready to go. Because it's so easy to use this is what we use with the STEM Camp girls during the summer.
- OpenSCAD – Another one of my personal favorites. OpenSCAD is not an interactive modeler like the other CAD programs. Instead it's more like a compiler. The user writes text into a file using a language that OpenSCAD understands. OpenSCAD then interprets the text into the finished model. The user can open OpenSCAD and a text editor side-by-side. The user can then make changes to the text file, save, and watch OpenSCAD update it's visual accordingly. The main strength of OpenSCAD is the fact that it uses a language. This allows the user the ability to break their model down into smaller chunks. Shapes can be made up of basic primitives and may be modified using boolean operations and mathematical functions. The addition of loops and conditionals allows even greater things to be produced with just a few lines of code.
- Blender – Blender is a free and open-source 3D creation suite. In addition to modeling, blender can also be used for animation. Because of this, blender can seem especially intimidating at first. But it can also be a useful tool, as it allows you to repair broken models in ways that other CAD programs do not.
There are more out there popping up every day…
Filament Storage
Filament tends to be hydroscopic, meaning that it will absorb moisture from the air. As it does so, the filament will become brittle and difficult to print with. So filament is stored in a sealed container with desiccant beads spread across the bottom.
- Return unused filament in the container and seal the lid.
- When pulling a spool of filament out of the container, make sure it doesn't have any desiccant stuck to it. Give it a shake or two and run your fingers along the bottom of the spool to dislodge anything that's gotten stuck in there.
The Printing Software
There's lots of different software that you can use to communicate with printers, but the particular software used here is called MatterControl. We're using an older version of this particular software because it's one of only two software solutions that will communicate with the Makerbot Replicator 2, and the only software that will communicate with both the Makerbot and the Prusa i2mk3s.
To start the software, click on the icon: 
Connecting To The Printer
Printers: The Makerbot 2
- If the LCD screen on the printer is not lit up, then turn it on by reaching around the right-hand side of the machine to the back, and flip the switch located at the bottom, next to where the power and USB cables connect to the machine.
- In the MatterControl window, in the upper-left of the window, is a button labeled “CONNECT”, and next to it a drop-down list:
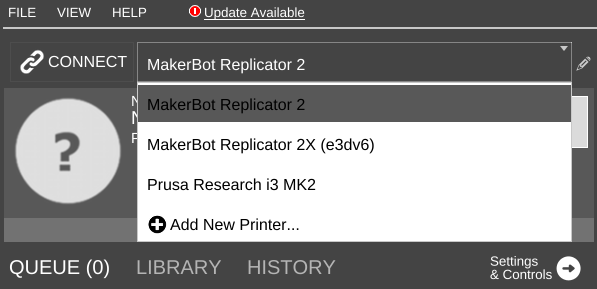
- Click the drop-down list and select: MakerBot Replicator 2
- Click: CONNECT
If the connection is successful then the CONNECT button will change to “DISCONNECT”

Printers: The Prusa i3mk2s
- If the LCD screen on the printer is not lit up, then turn it on by reaching around the right side of the machine and flip the power switch located at the bottom, underneath the power supply.
- In the MatterControl window, in the upper-left of the window, is a button labeled “CONNECT”, and next to it is a drop-down list:
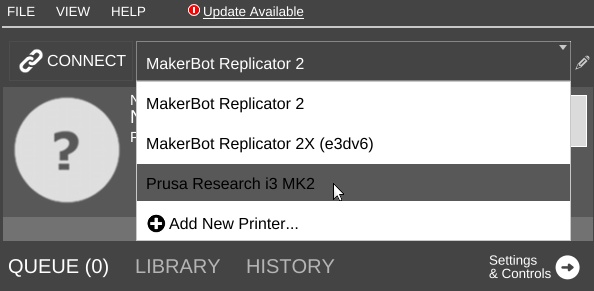
- Click the drop-down list and select: Prusa Research i3 MK2
- Click: CONNECT
If the connection is successful then the CONNECT button will change to “DISCONNECT”

MatterControl Manual
A more comprehensive rundown of MC's functions can be found here:
http://wiki.mattercontrol.com/Main_Page
I'll just give you a quick rundown of a basic printing process in the instructions below.
Loading A Model
- In the lower-left corner of the MatterControl window, click: Add

- In the file browser window that appears, navigate to the directory where your model file is, select the file, and click: Open

- The model will appear in the print queue list on the left wide of the window, and a 3D rendering of the model will appear on the right.
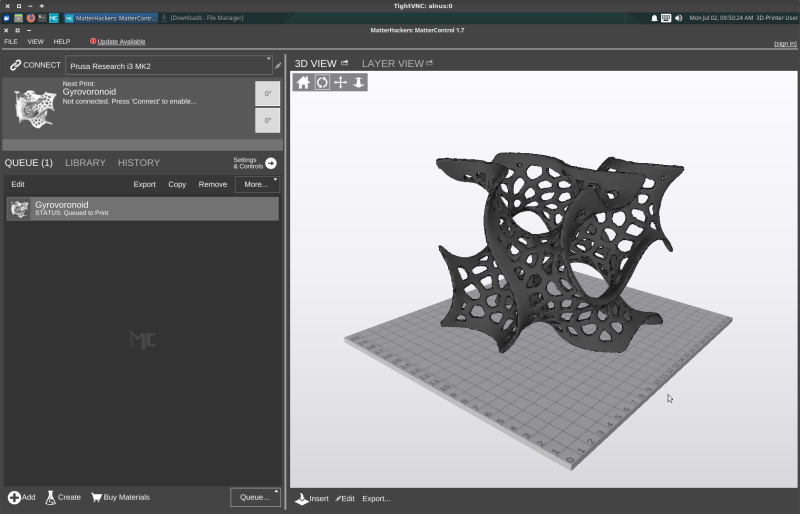


The portion of the window listing the print queue also shows other controls. The queue is just one of the tabs listed along the top of this portion of the window. The other tab you will use often will be the “Settings & Controls” tab, from which you can modify
Preparing A Model For Print
The model rendering portion of the window on the right contains two tabs at the top, labeled “3D VIEW” and “LAYER VIEW”.
- If you need to rotate or scale your model, then, under the “3D VIEW” tab, at the bottom of the window:
- Click: “Edit”
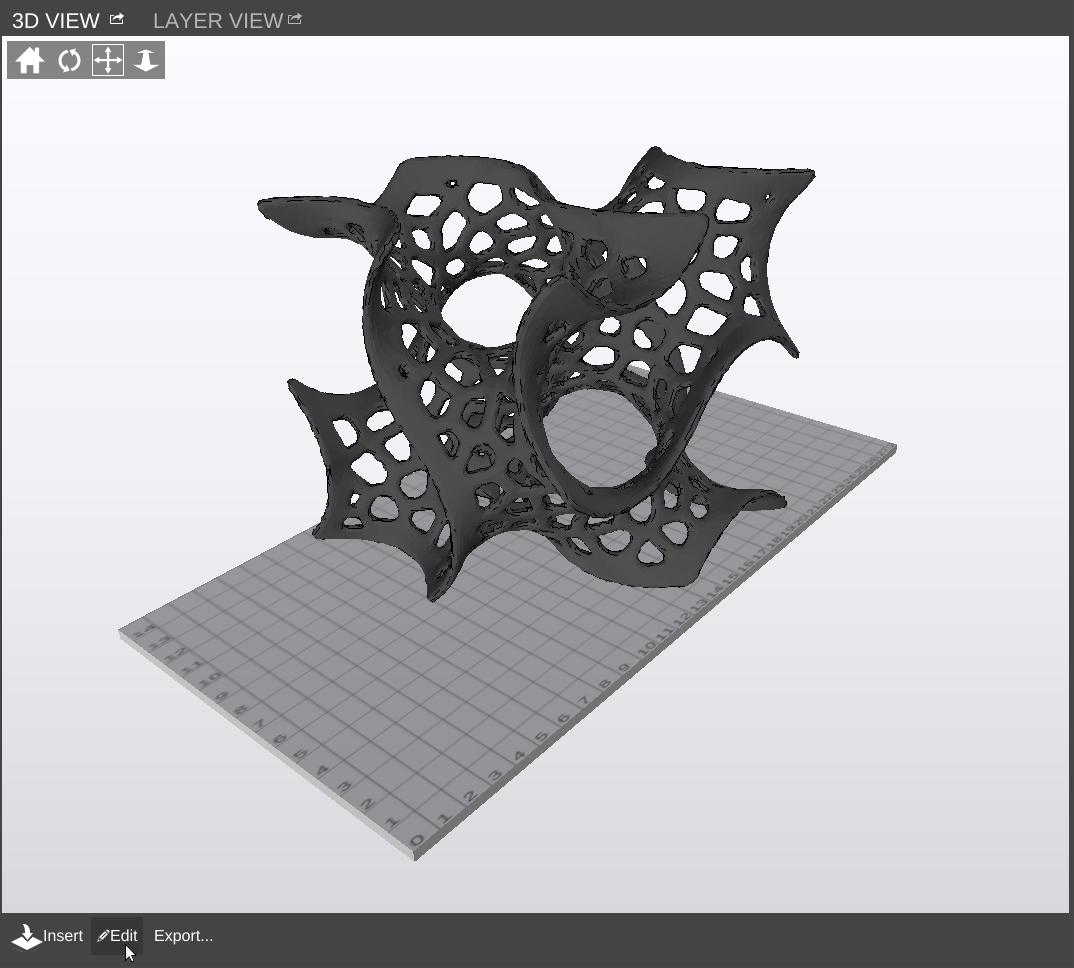
- Use the editing tools on the right of the window.

- When finished, click “Save” (or “Cancel”)


- If your model contains overhanging parts that might need support during print, here is how you turn on/off support generation:
- Click: Settings & Controls

- Click the tab: Settings

- Under the Settings tab, click: General
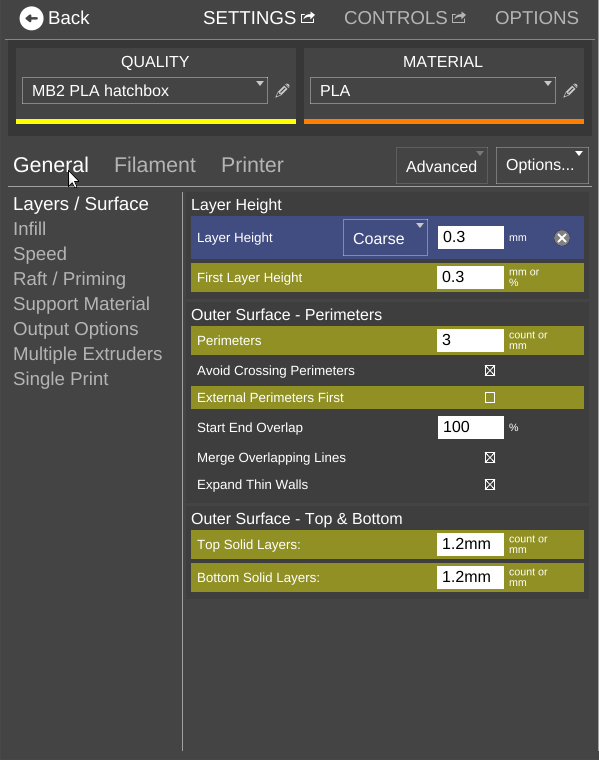
- Under General, click: Support Material
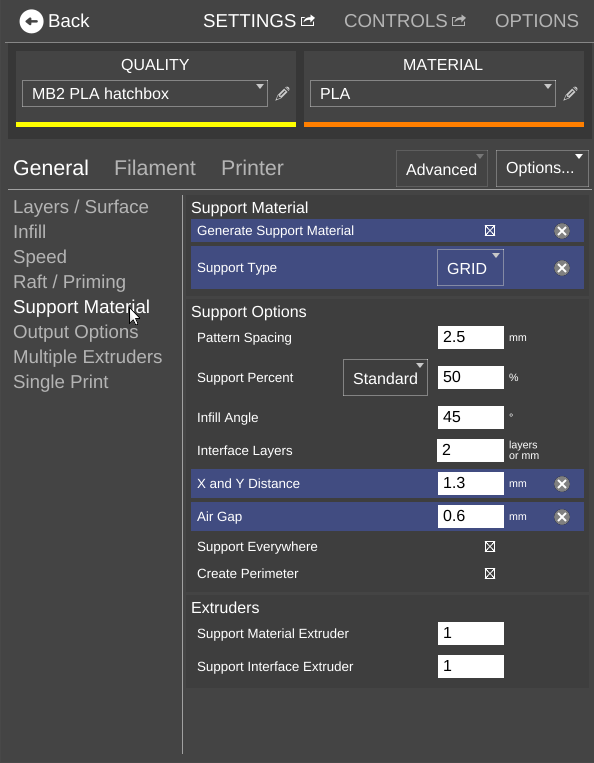
- Check the box: Generate Support Material
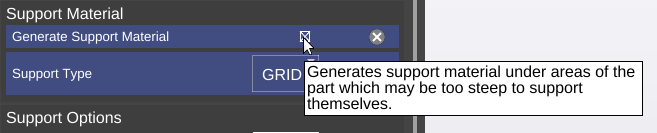
This will generate support for parts of the model that overhang above the build plate.
NOTE: This will not generate support for parts of the model that overhang other parts of the model. See “Support Everywhere” below.
NOTE: To return a setting to it's default value, click the gray circle with the white “x” off to the right:
- If your model has parts that overhang other parts of the model – i.e. there are parts of the model that separate the overhang from the build plate – then you may need to turn on additional support.
Click the checkbox: Support Everywhere:


- Click: LAYER VIEW, then click: Generate
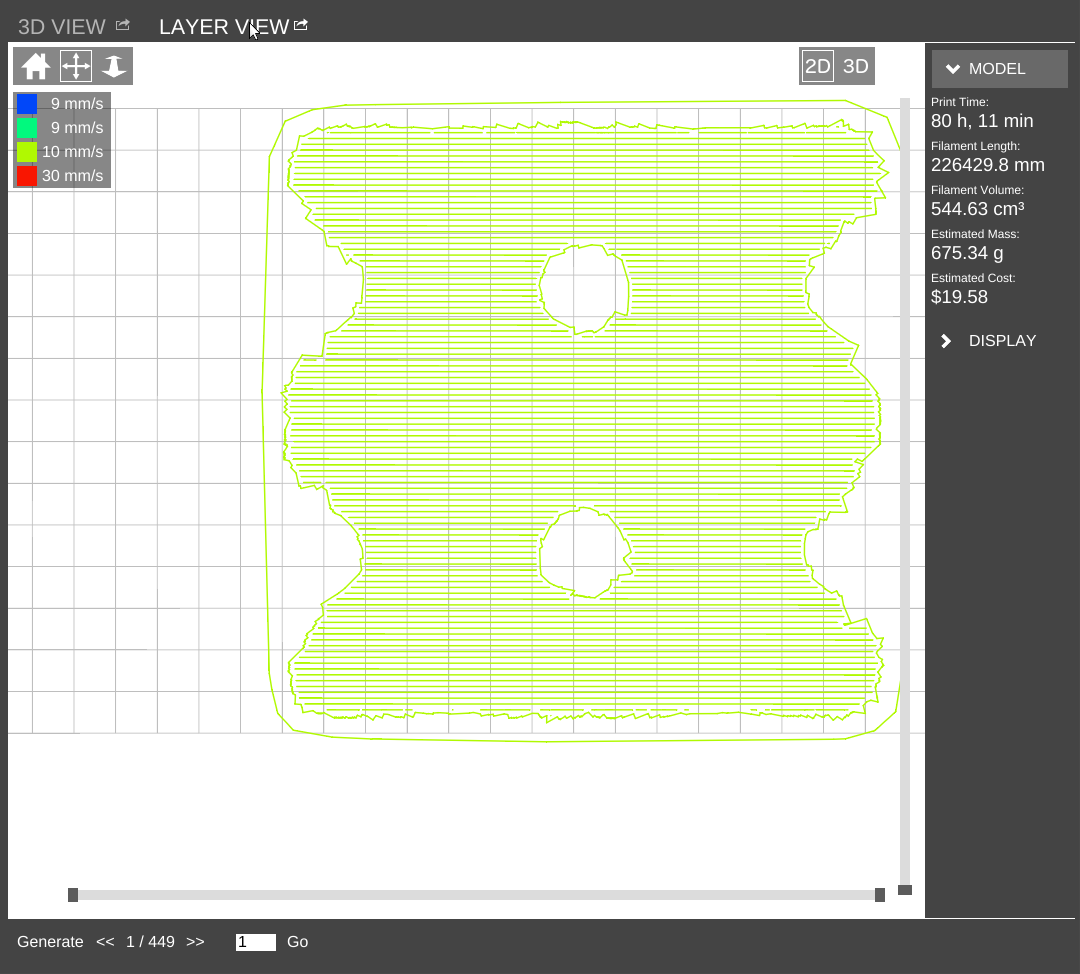
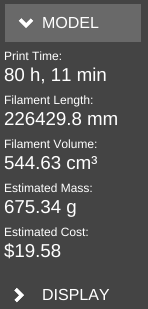
After generating a list of print instructions for the printer, MC will display some statistics along the right side of the window, including a rough estimate of the expected print time and amount of filament used.
- By default, MC will only show you the first layer under the LAYER VIEW pane. Click: 3D
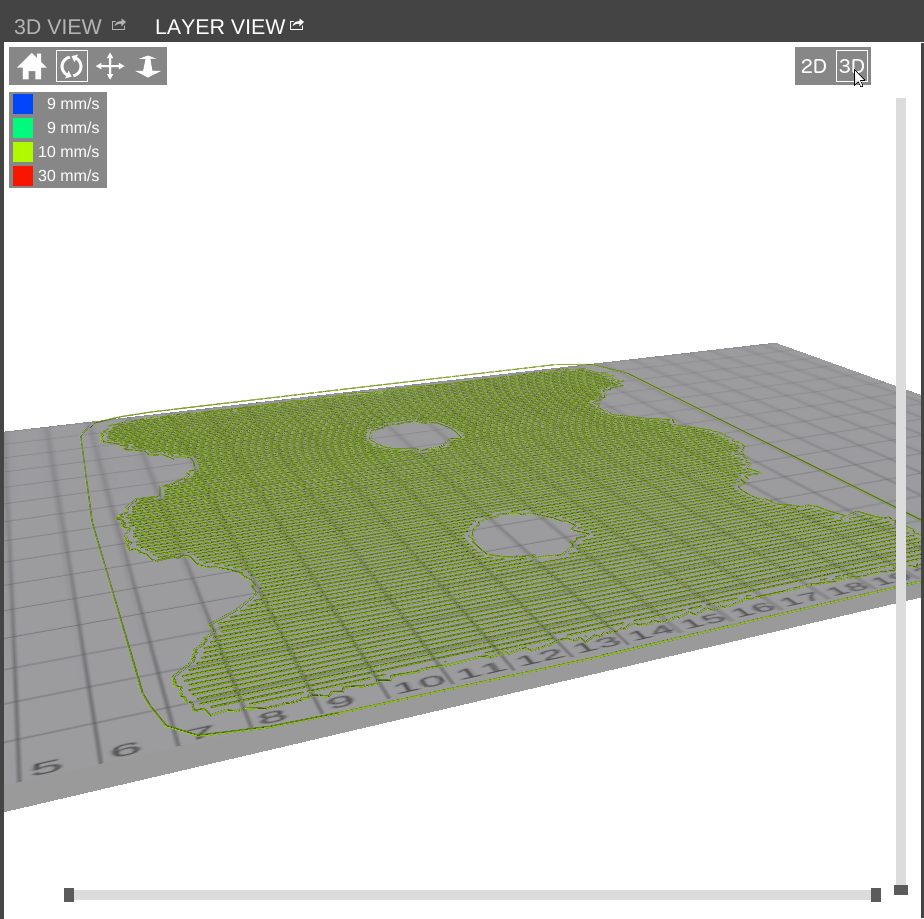
- Use the slider on the right of the layer view pane, or the layer selection controls at the bottom, to view the expected output of the generated print commands. This output will not only include the model itself, but also any support material printed as well. Print speeds are color-coded with a legend displayed in the upper right of the pane.
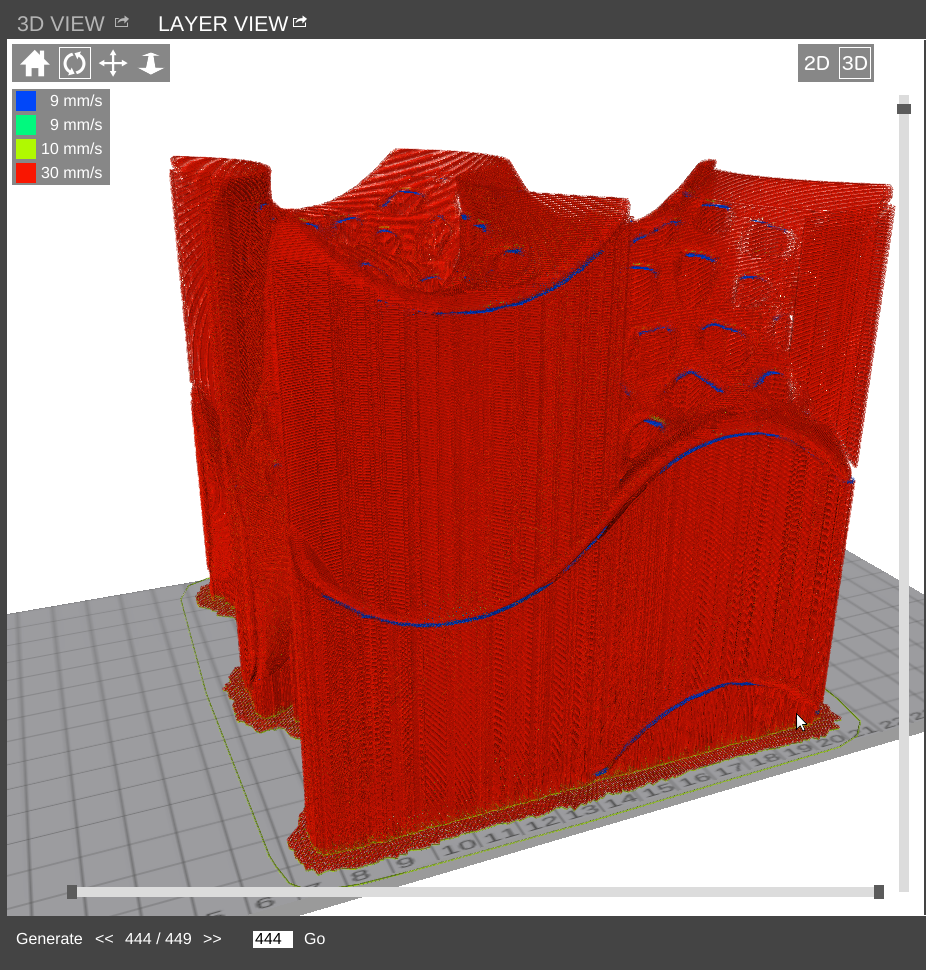


NOTE: Any support material that you print will increase print time. Also, removing support material can be challenging, so think about the print instructions as displayed in the LAYER VIEW and consider whether or not rotating or scaling the model might help.
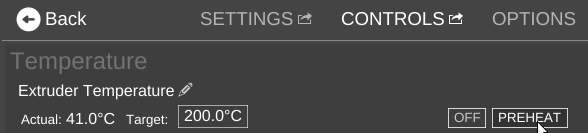
Prepping The Printer
- Click: CONTROLS
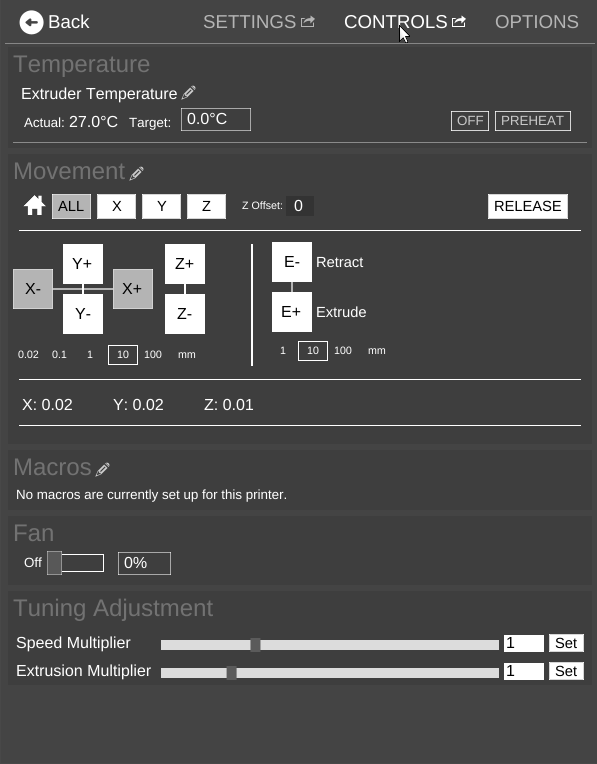
- Click: PREHEAT


Removing Filament From The Printer
- Wait for the printer to reach temperature
- Click: Retract
Gently pull up on the filament as it retracts. Continue clicking Retract until the filament comes loose from the extruder drive.

Inserting Filament Into The Printer
- Wait for the printer to reach temperature
- Using a pair of scissors, cut the end of the filament at a 45 degree angle to make a point
- Press on the tension release handle on the extruder drive to make it easier to insert the filament
- While holding on the tension release handle, insert the filament into the print head. You will probably have to finagle it around a bit before it goes all the way in. But once inserted properly you should be able to push the filament through by hand and see a thin stream of it coming out of the bottom of the print head.
Prepping The Build Plate
- Makerbot Replicator 2 – The build plate is covered with painter's tape. Make sure that the tape is secure and free from tears. If the tape needs to be replaced then the build plate can be removed by pushing the plate back and lifting the front of the plate out of it's holding tabs. Replace any damaged tape, and then replace the build plate back into the machine. After replacing a strip of tape, use the alcohol and cotton swabs to rub down the new tape for a bit. This will remove some of the waxy surface of the tape and allow the filament to adhere better to the build plate. Use some glue stick as added insurance if necessary.
- PRUSA i3 MK2s – The PRUSA has been modified to use a glass build plate. Glue stick is used to create a tacky surface on the glass so that the first layer will stick well. If needed, smear on some more glue stick.
NOTE: Try not to touch the surface of the build plate with your hands. Handle the build plate by the edges only. Oils from your skin can interfere with the ability of the filament to adhere to the build plate, resulting in failed prints.
Beginning Your Print
- Click: Print
- Makerbot Replicator 2 – No special requirements are needed to start a print on the Makerbot.
- PRUSA – The glass build plate on the PRUSA is an aftermarket modification. When MatterControl begins a print some special care must be taken:
- MC will beep at you and display a pop-up window telling you that the printing process has been paused.

- Remove the clips holding the glass build plate onto the bed, and then remove the glass plate.
- Click: Resume
The printer will go through a self-leveling routing where the extruder head will use a probe on multiple points around the bed.
If the glass were still on the bed during this self-leveling process then the extruder head would crash into the glass, possibly damaging the printer and/or breaking the glass.
- Once the self-leveling process has completed and the printer has reached temperature, MC will beep at you a second time.
Place the glass back onto the bed and secure with the four clips. Make sure the clips and glass won't collide with anything as the build plate moves forward and backward. - Click: Resume
- Watch as the first layer is printed. The first layer should look slightly smooshed as it's extruded onto the build plate. A poor first layer can have disastrous effects on the rest of the print, so if anything goes wrong then consider canceling the print, make some alterations if necessary, and restarting the print.

NOTE: If anything goes horribly wrong during the printing process click “Cancel Print”. If the printer is in danger of damaging itself then cycle the printer off and on again. This will interrupt the printing process immediately but still allow the printer to run it's fans to prevent part damage. Then see the IT manager for help.
Removing A Print
Using the tools provided, carefully remove the model from the bed. For the Makerbot, try to avoid ripping the tape if possible. For the PRUSA, you may remove the clips and then remove the glass plate to make it easier to then remove the model from the glass.
My Print Failed, This Sucks!

3D printing can be a challenge. Especially if you're new and/or your printer isn't finely tuned just right (and chances are our printers are not tuned just right). Feel free to consult with the IT manager for assistance at any point along your printing journey!
